Install Yii PHP Framework & LAMP on Linux Mint

install LAMP (Linux, Apache, MySQL, and PHP) untuk linux terlebih dahulu, bisa lihat tutorial lengkapnya disini .

setelah LAMP terinstal,

Buat DB di MySQL untuk YII

  • buat database ‘yiidb‘ dengan user ‘yiiuser‘ dan password ‘ubuntu‘.

Download yii dari official download page atau download via terminal :

extract hasil download :
  • ~$ tar zxvf yii-1.1.13.e9e4a0.tar.gz

pindahkan folder hasil extract tersebut ke dalam /var/www/

  • ~$ sudo mv yii-1.1.13.e9e4a0/ /var/www/yii

buat folder aplikasi kamu di bawah folder /var/www/yii, contoh buat folder unixmen :

  • ~$ sudo mkdir /var/www/yii/unixmen

ubah permission folder unixmen :

  • ~$ sudo chmod -R 777 /var/www/yii/unixmen/

install yii :

  • ~$ php /var/www/yii/framework/yiic.php webapp /var/www/yii/unixmen/
  • Create a Web application under ‘/var/www/yii/unixmen’? (yes|no) [no]:yes
tes yii di browser :
Enable Yii code generation tool GiiModule
edit main.php dalam folder /var/www/yii/unixmen/protected/config/
hapus tanda “/*” dan “*/” untuk mengaktifkan GiiModule
// uncomment the following to enable the Gii tool
/* ‘gii’=>array(
‘class’=>’system.gii.GiiModule’,
‘password’=>’ubuntu‘,
// If removed, Gii defaults to localhost only. Edit car$
‘ipFilters’=>array(‘127.0.0.1′,’192.168.1.*‘), ), */
),

Gem Paperclip: Uploading pictures into your Rails 3.2.13

  • rails new paperclip-sample-app
  • cd paperclip-sample-app
  • rails g scaffold user name:string email:string
  • Before start using paperclip, we need to add it in our Gemfile.

gem ‘rails’, ‘3.2.13’
# Bundle edge Rails instead:
# gem ‘rails’, :git => ‘git://github.com/rails/rails.git’
gem ‘sqlite3’
gem “paperclip”, “~> 2.3”

  • rails generate paperclip user avatar
  • rake db:migrate
  • open your model and check out the code below

class User < ActiveRecord::Base
attr_accessible :email, :name, :avatar
has_attached_file :avatar,
:styles => { :thumb => “75×75>”,
:small => “150×150>”
}
end

  •  then edit the new user form (app/views/users/_form.html.erb)

<%= form_for(@user, :html => { :multipart => true }) do |f| %>
<% if @user.errors.any? %>
<div id=”error_explanation”>
<h2><%= pluralize(@user.errors.count, “error”) %> prohibited this user from being saved:</h2>

<ul>
<% @user.errors.full_messages.each do |msg| %>
<li><%= msg %></li>
<% end %>
</ul>
</div>
<% end %>

<p>
<%= f.label :name %><br />
<%= f.text_field :name %>
</p>
<p>
<%= f.label :email %><br />
<%= f.text_field :email %>
</p>
<p>
<%= f.label :avatar %><br />
<%= f.file_field :avatar %>
</p>
<p>
<%= f.submit ‘Create’ %>
</p>
<% end %>

  • then edit the new user form (app/views/users/index.html.erb)

<h1>Listing users</h1>

<table>
<tr>
<th>Photo</th>
<th>Name</th>
<th>Email</th>
</tr>

<% @users.each do |user| %>
<tr>
<td><%= image_tag user.avatar.url(:thumb) %></td>
<td><%= user.name %></td>
<td><%= user.email %></td>
<td><%= link_to ‘Show’, user %></td>
<td><%= link_to ‘Edit’, edit_user_path(user) %></td>
<td><%= link_to ‘Destroy’, user, method: :delete, data: { confirm: ‘Are you sure?’ } %></td>
</tr>
<% end %>
</table>

<br />

<%= link_to ‘New User’, new_user_path %>

Source:

  1. patshaughnessy.net
  2. codeabout.wordpress.com

Contoh PostgreSQL dan PHP Codeigniter (CodeIgniter_2.1.3)

1. config.php

    $config[‘base_url’] = ‘http://localhost/postgre_ci/&#8217;;

2. database.php

$db[‘default’][‘hostname’] = ‘localhost’;
$db[‘default’][‘username’] = ‘userbaru’;
$db[‘default’][‘password’] = ‘pwduserbaru’;
$db[‘default’][‘database’] = ‘dbcoba’;
$db[‘default’][‘dbdriver’] = ‘postgre’;
$db[‘default’][‘port’] = 5432; //tambahkan sendiri
$db[‘default’][‘dbprefix’] = ”;
$db[‘default’][‘pconnect’] = TRUE;
$db[‘default’][‘db_debug’] = TRUE;
$db[‘default’][‘cache_on’] = FALSE;
$db[‘default’][‘cachedir’] = ”;
$db[‘default’][‘char_set’] = ‘utf8’;
$db[‘default’][‘dbcollat’] = ‘utf8_general_ci’;
$db[‘default’][‘swap_pre’] = ”;
$db[‘default’][‘autoinit’] = TRUE;
$db[‘default’][‘stricton’] = FALSE;

3. autoload.php
$autoload[‘libraries’] = array(‘database’);
$autoload[‘helper’] = array(‘url’,’html’);

4. lat_model.php (Model)
<?php
class Lat_model extends CI_Model {
function ambil_data(){
$this->db->order_by(‘id’,’ASC’);
$query = $this->db->get(‘tbllat’);
return $query->result();
}
}
?>

5. lat.php (Controller)
<?php
class Lat extends CI_Controller {
public function __construct() {
parent::__construct();
$this->load->model(‘lat_model’);
}
function index () {
if ($query = $this->lat_model->ambil_data()){
$data[‘rowrecord’]=$query;
}
$this->load->view(‘viewlat’, $data);
}
}
?>

6. viewlat.php
<h1>Daftar Tabel Latihan</h1>
<table border=”1″ cellpadding=”3″>
<tr>
<th>ID</th>
<th>Nama</th>
</tr>
<?php
if(isset($rowrecord)) {
foreach ($rowrecord as $row) {
echo “<tr>
<td>$row->id</td>
<td>$row->nama</td>
</tr>”;
}
}
else {
echo “No returned data”;
}
?> </table>

Tampilan Output viewlat.php

Koneksi PostgreSQL dengan PHP

Asumsikan, file yang saya buat ini bernama konek.php

<?php

// connecting, selecting database
// anda harus sesuaikan dbnam, user dan password sesuai dengan setting pada database server anda

$conn_string = “host=localhost port=54322 dbname=xxxx user=postgres password=postgres”;

$connection = pg_connect($conn_string);

if (!$connection) {
print(“Connection Failed”);
exit;
}
else print(“Connection Success”);
?>

simpan di halaman .xampp/htdocs/folder_kamu/konek.php.

Lalu tinggal buka di browser, kalau berhasil akan seperti ini :

selamat mencoba!

Integrasi XAMPP + PostgreSQL + PHPPgAdmin di Windows

Prakondisi:

  • Download the latest XAMPP here
  • Download the latest PostGreSQL here
  • Download phppgAdmin here
Kemarin saya mencoba-coba bagaimana caranya mengintegrasikan XAMPP dengan database PostGreeSQL. Sebagaimana yang telah kita ketahui, bundle default DBMS dari XAMPP adalah MySQL bukan PostGreSQL. Jadi untuk menyatukan kedua perangkat tersebut, kita harus mengerjakannya sendiri.
1. Install XAMPP. Biasanya secara default XAMPP akan membuat data di directory C:\XAMPP
2. Install PostGreSQL.
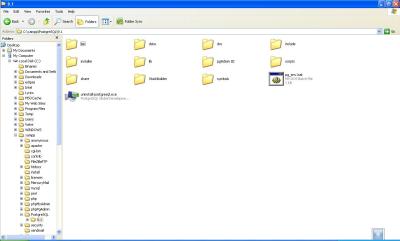
  • Jangan lupa, PostGreSQL kita taruh di dalam directory yang sama dengan XAMPP. Jika barusan XAMPP anda di install di C:\XAMPP maka pastikan PostGreSQL berada di C:\XAMPP\PostGreSQL.
  • Tuliskan password untuk user db. (jangan lupa untuk mengingat passwordnya.)
  • Cari File  “php.ini”, di  C:\xampp\php\php.ini, kemudian cari baris “;extension=php_pgsql.dll” hapus tanda ‘;’ nya sehingga hasilnya jadi “extension=php_pgsql.dll”
3. Deploy PhpPgAdmin
  • Ekstrak dan copy PhpPgAdmin kedalam folder C:\XAMPP\phpPgAdmin
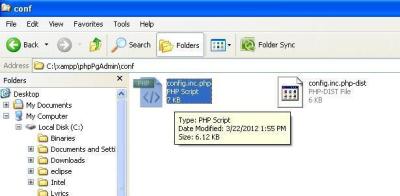
  • Edit file config.inc dalam directory  C:\XAMPP\phpPgAdmin\conf\config.inc
           $conf[‘servers’][0][‘desc’] = ‘PostgreSQL’;
           $conf[‘servers’][0][‘host’] = ‘localhost’;
           $conf[‘servers’][0][‘port’] = 5432;
           $conf[‘servers’][0][‘sslmode’] = ‘allow’;
           $conf[‘servers’][0][‘defaultdb’] = ‘postgres’;
           $conf[‘servers’][0][‘pg_dump_path’] = ‘C:\xampp\PostgreSQL\9.1\bin\pg_dump.exe’;
           $conf[‘servers’][0][‘pg_dumpall_path’] = ‘C:\xampp\PostgreSQL\9.1\bin\pg_dumpall.exe’;
  • Edit file httpd-xampp.conf pada directory C:\xampp\apache\conf\extra
          Alias /phppgadmin “C:/xampp/phpPgAdmin/”
         <Directory “C:/xampp/phpPgAdmin”>
           AllowOverride AuthConfig
           Order allow,deny
Allow from all
        </Directory>
       Script diatas dituliskan diantara tag <IfModule alias_module> </ifModule>.
       Agar tidak membingungkan berikut screenshotnya
       
  • Tambahkan ‘phpPgAdmin’ pada tag <LocationMatch> sehingga menjadi :

<LocationMatch “^/(?i:(?:xampp|security|licenses|phpmyadmin|phpPgAdmin|webalizer|server-status|server-info))”>

  •     Save file.

3. Restart / Jalankan Apache

  • Kemudian buka browser dan masukan URL http://localhost/phppgadmin. Kalau berhasil, maka seharusnya tampilannya akan seperti ini
  • Selesai.

TROUBLESHOOT
Setelah mengikuti dengan saksama tutorial diatas ternyata kamu masih menemukan pesan error ini saat menjalankan XAMPP kamu lagi:

Jangan panik, jangan frustasi. Saya pun mengalami hal serupa. Cara penanggulangannya adalah dengan memindahkan file LIBPQ.dll yang berada di directory C:\xampp\PostgreSQL\9.1\lib ke dalam directory C:\xampp\apache\bin. Pesan error tersebut muncul dikarenakan server apache kamu kekurangan file yang diperlukan dalam mengenali postgreSQL.
Menurut pengalaman saya, ada 3 file yang harus di copy ke C:\xampp\apache\bin yaitu:
  • libpq.dll
  • libiconv-2.dll
  • libintl-8.dll

source:

  1. Mengintegrasikan XAMPP dan PostGreSQL di Windows (http://blogs.itb.ac.id)
  2. Integrasi XAMPP + PostgreSQL + PHPPgAdmin (http://ganjarramadhan.wordpress.com)
  3. Integrasi XAMPP 1.7.7 dengan POSTGRESQL 9.1 pada Windows XP